

A Beginner's Guide to Appwrite


By the end of this tutorial, you will learn what Appwrite is, how to install Appwrite, the services that Appwrite offers, why Appwrite and the difference between Appwrite and other backend servers.
Appwrite
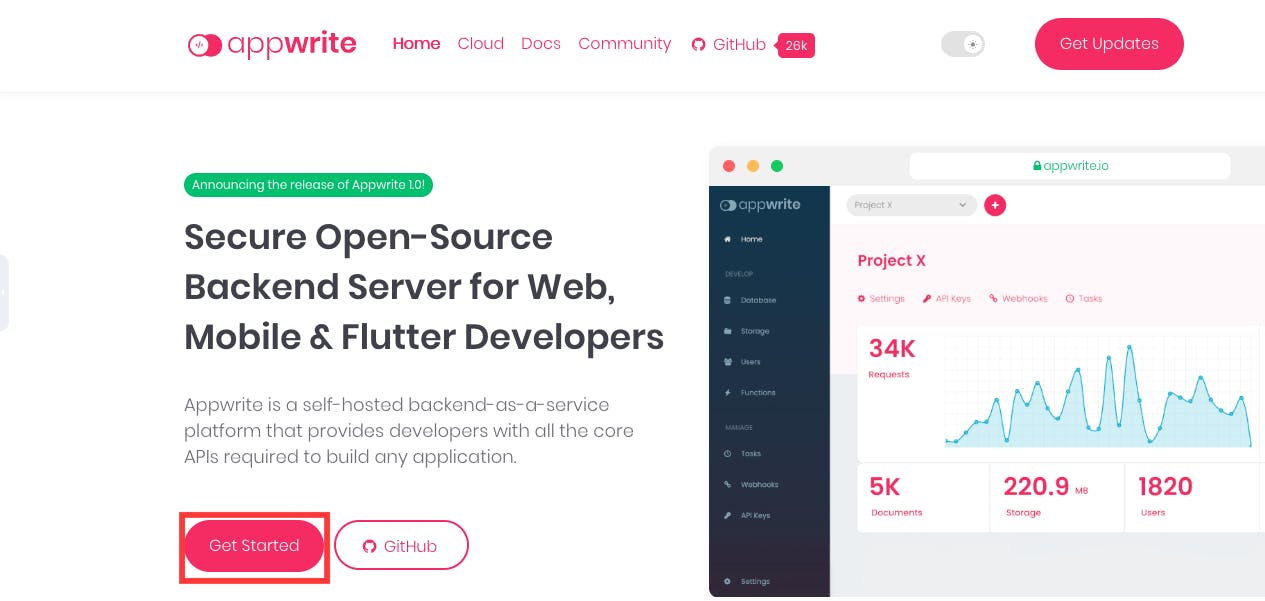
According to the Appwrite landing page
Appwrite is a self-hosted backend service platform that provides developers with all the core Application Programming Interface (APIs) required to build any application.
In a situation where you want to build an application and you don't know much about databases, authentication, or building your own API(Application Programming Interface), You can rely on Appwrite as it provides these services for you.
In summary, Appwrite helps you with the Backend of an application.
Installation
Prerequisite
In order to get Appwrite to work on your system, you have to, first of all, install Docker on your system. You can install Docker from the official Documentation.
There are eight steps to install Appwrite on your system
Step 1
From the Appwrite landing page click on Get Started button
Step 2
A modal will pop up showing different commands that are specific to your operating system.
1) UNIX 2) CMD 3) PowerShell
Copy the command that is specific to your operating system and paste it on your terminal.
Unix
The Unix is specific to Mac os.
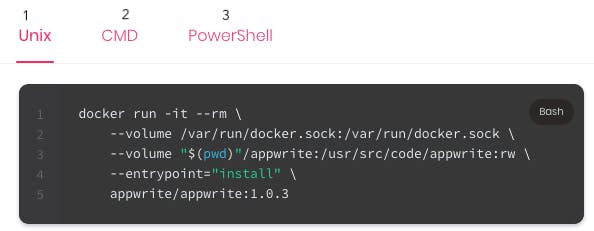
docker run -it --rm \
    --volume /var/run/docker.sock:/var/run/docker.sock \
    --volume "$(pwd)"/appwrite:/usr/src/code/appwrite:rw \
    --entrypoint="install" \
    appwrite/appwrite:1.0.3
CMD
The CMD is used by Windows operating system. You have to enable Hyper-V and Containers Windows features to enable you to run Appwrite on Windows with Docker
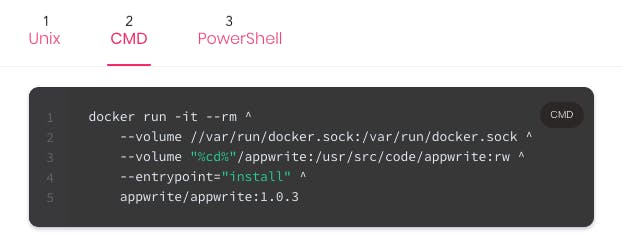
docker run -it --rm ^
    --volume //var/run/docker.sock:/var/run/docker.sock ^
    --volume "%cd%"/appwrite:/usr/src/code/appwrite:rw ^
    --entrypoint="install" ^
    appwrite/appwrite:1.0.3
PowerShell
The Windows operating system also uses PowerShell.
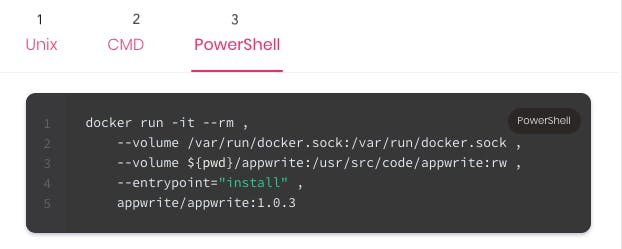
docker run -it --rm ,
    --volume /var/run/docker.sock:/var/run/docker.sock ,
    --volume ${pwd}/appwrite:/usr/src/code/appwrite:rw ,
    --entrypoint="install" ,
    appwrite/appwrite:1.0.3
Step 3
Copy the command that suits you based on your terminal type and paste it into your terminal. I will be using the Unix command since I am using a Mac Os system.
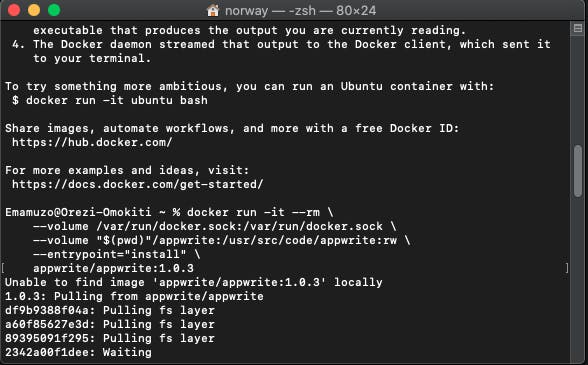
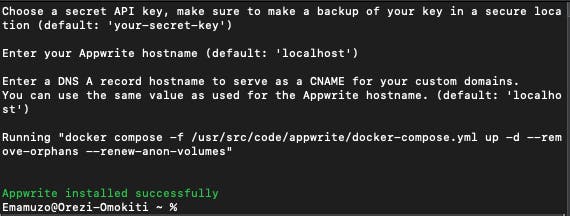
Step 4
Once the installation is done you will get that Appwrite has been installed successfully
Step 5
Go to your browser and type in http://localhost:80(this is the default hostname given by Appwrite) to access app write on your local host. You will be routed to a sign up page to create your root account.

Fill in your credentials and Click on the Sign Up button.
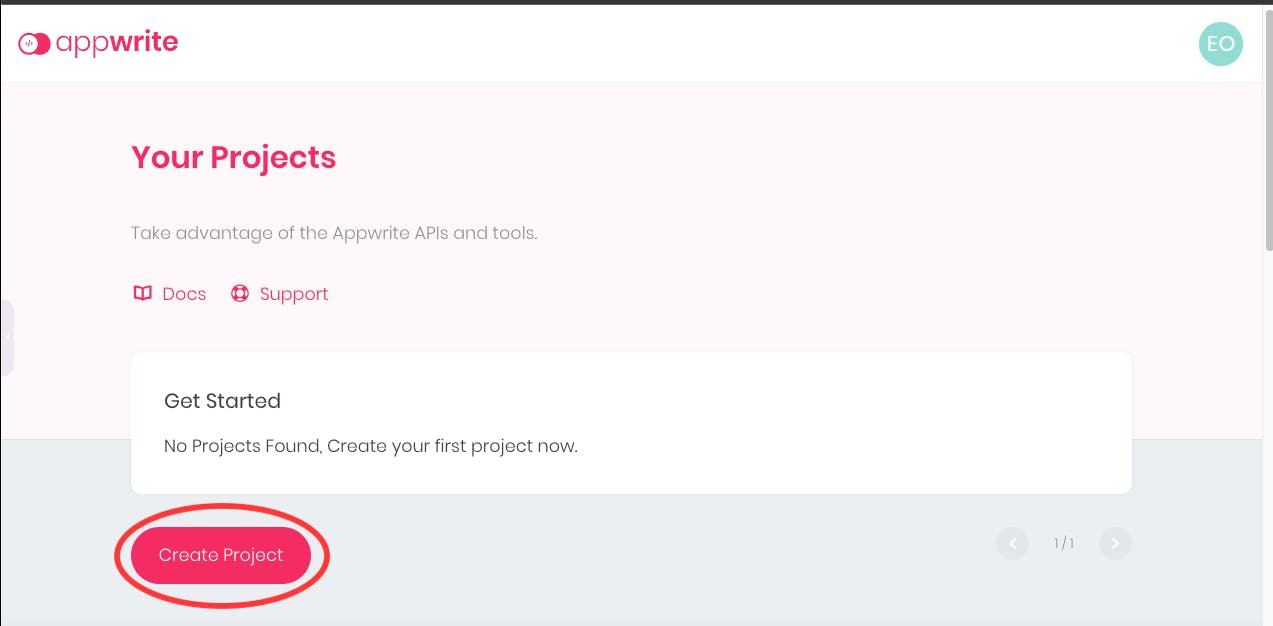
Step 6
You will be routed to your Projects home page. Click on the Create Project button.
Step 7
A white modal will pop up, give your project a Name. I will give my own Komaro. The Project ID will be generated by appwrite. Click on Create button.

Step 8
You will be routed to your project console.
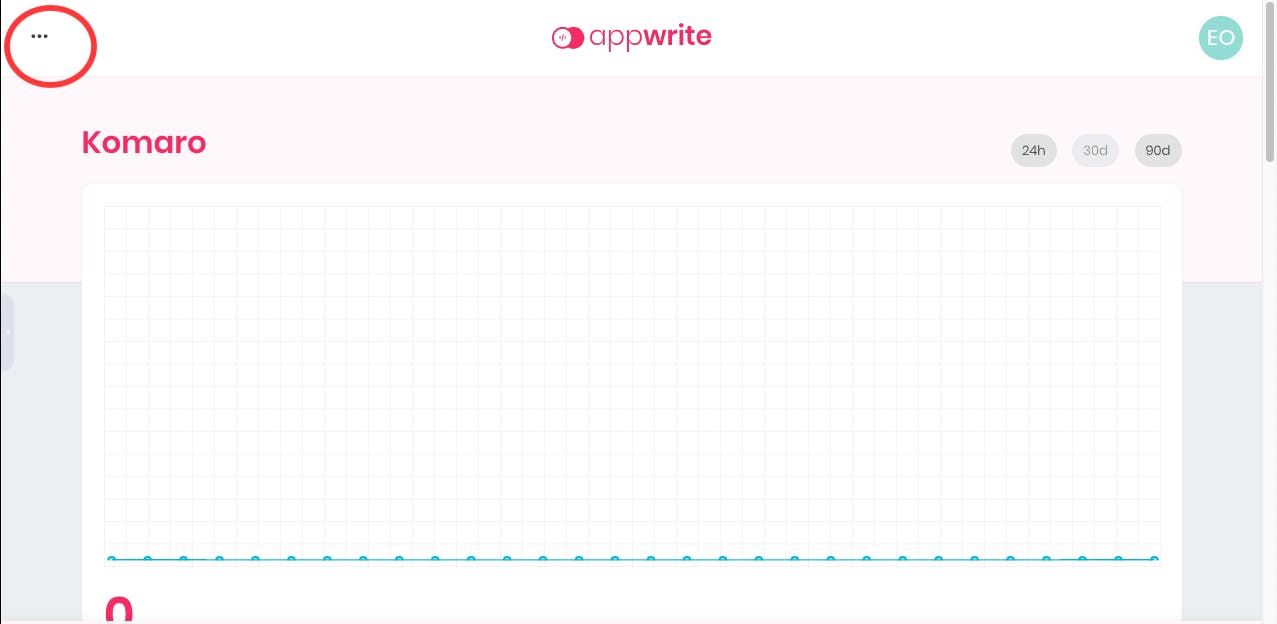
Click on the dotted icon to see the services that Appwrite has to offer.
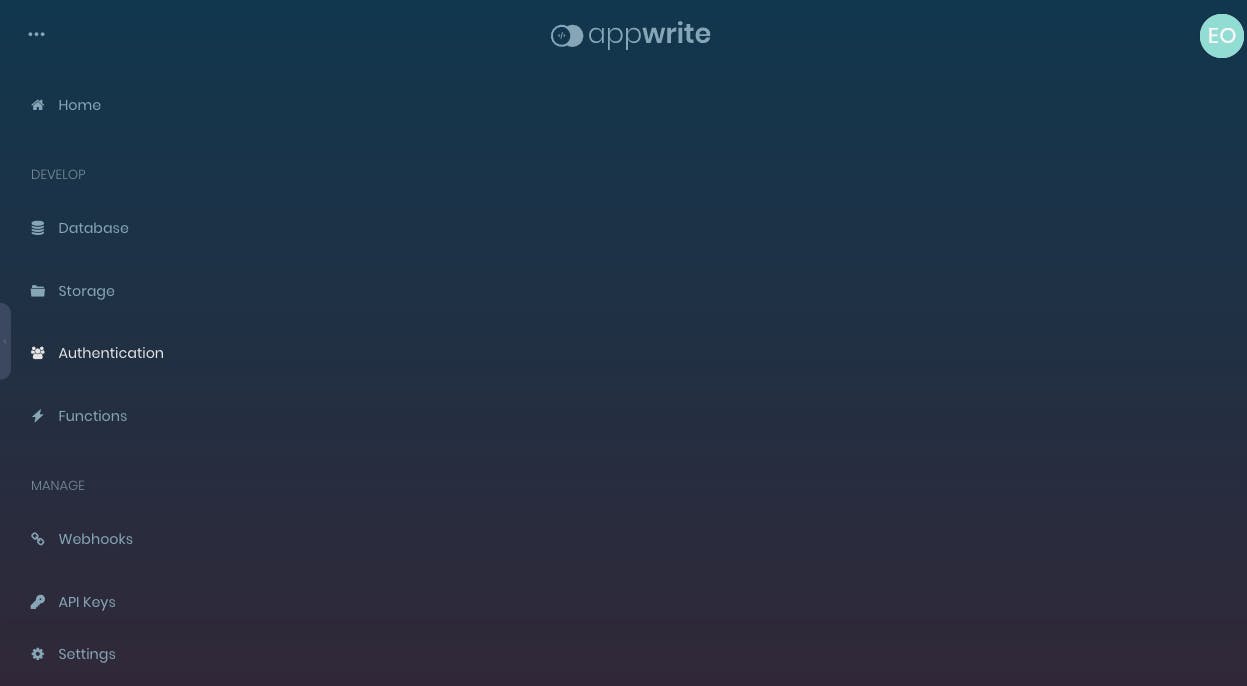
Appwrite Services
Appwrite has five services that it offers;
- Database
- Storage
- Authentication
- Functions
- Webhooks
In this article, you will learn how to use Authentication services for your web project.
Under the Authentication services, we have the Account and User.
The Account and User have different API endpoints. You can explore more from the Appwrite documentation.
How to use Authentication Services
In this article, You will learn how to Create an account and Get account details using the Account API through the use of a sign up form and Get an account using a login/sign in form.
Note: The Account API has a client and server side. This article will concentrate on the client side.
Create an Account
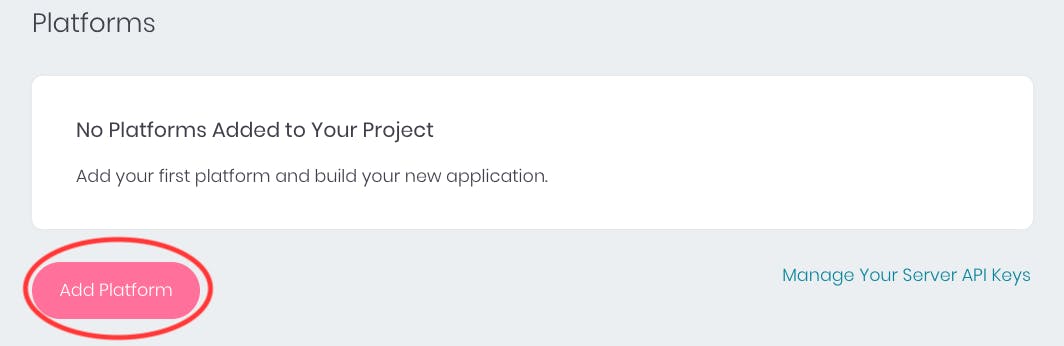
Step 1
Go to your project console, scroll down to the platforms section, and Click on Add Platform button.

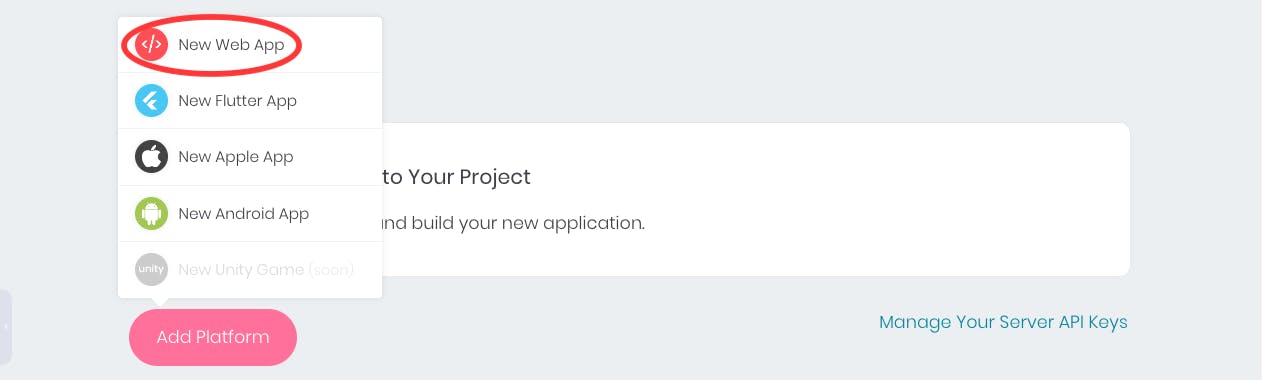
Step 2
A modal will pop up Click on New Web App
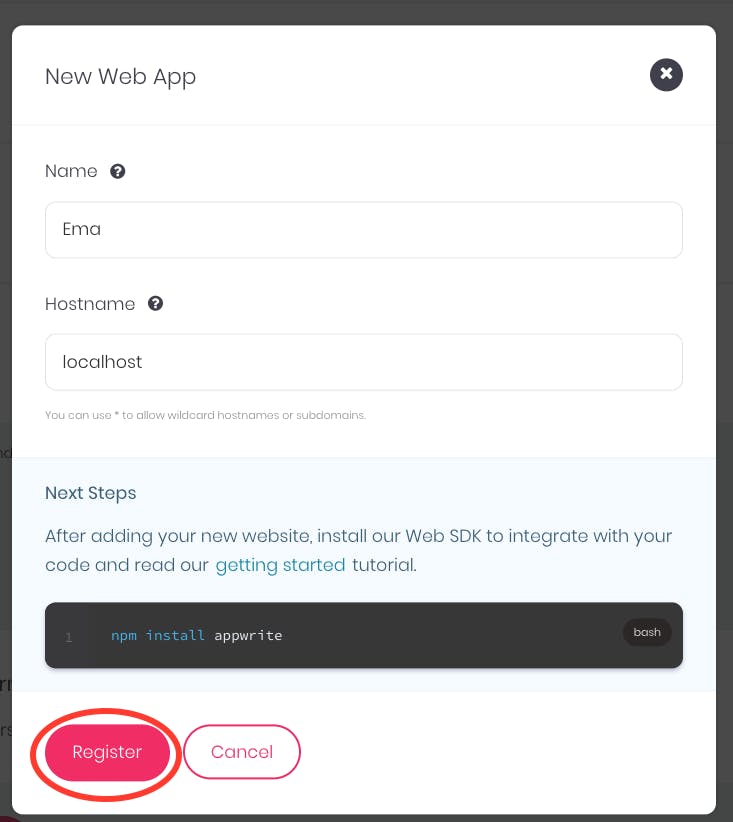
Step 3
You will be routed to another modal to fill in your web app details.
Copy the npm install appwrite. You will need it to install Appwrite on your web application.
Click on the Register button
When you scroll down to the platforms section you will be able to see the web app you just created
Step 4
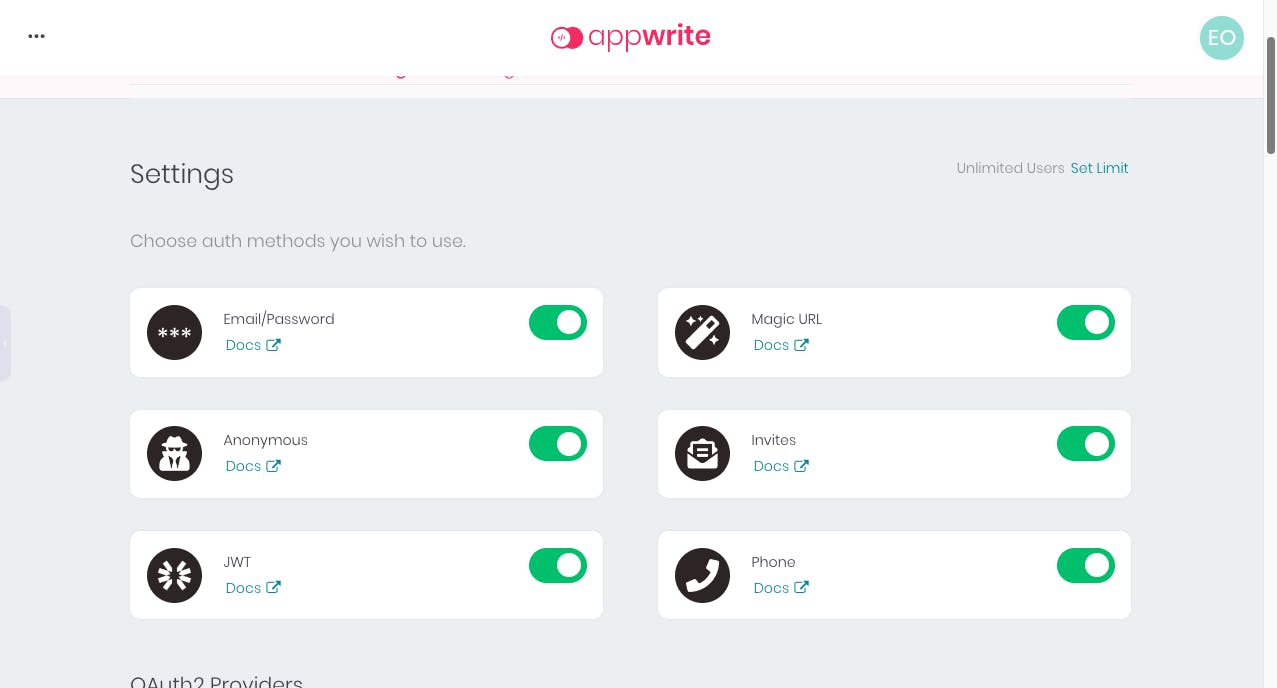
In order to use the email/password authentication you have to check that your auth for email/password is on. Go to your Appwrite console and click on Users from the menu tab. Click on Settings. You will see the available auth methods,You can toggle it based on your prefence.
Step 5
Open your vs code terminal and create a new React app using the command npx create-react-app my-app
Step 6
Once You are done with creating a new React App, open the new react app folder in your Vscode.
Step 7
Create a folder and name it components. Inside the Components folder, create a file and name it Signup. Jsx. In your Signup.jsx you will create a sign up form.
import { useState } from "react";
import "../styles/Signup.css";

const SignUp = () => {
  const [name, setName] = useState("");
  const [email, setEmail] = useState("");
  const [password, setPassword] = useState("");

  return (
    <div className="Signup">
      <form>
        <div className="contain">
          <h2 className="header_form">Sign up</h2>
          <label htmlFor="name">
            Name
            <input
              type="text"
              id="name"
              className="signup_input"
              value={name}
              onChange={(e) => {
                setName(e.target.value);
              }}
            />
          </label>
          <label htmlFor="email">
            Email
            <input
              type="email"
              id="email"
              className="signup_input"
              value={email}
              onChange={(e) => {
                setEmail(e.target.value);
              }}
            />
          </label>

          <label htmlFor="password">
            Password
            <input
              type="password"
              id="password"
              className="signup_input"
              value={password}
              onChange={(e) => {
                setPassword(e.target.value);
              }}
            />
          </label>
          <button className="button_signup">SignUp</button>
        </div>
      </form>
    </div>
  );
};

export default SignUp;
Step 8
Go to your terminal on vs code and install Appwrite using npm install appwrite
Create another folder and name it services. Inside the services folder, create a file and name it appwrite.jsx.
Step 9
Go back to the Appwrite documentation. Click on Account under the Rest API section.
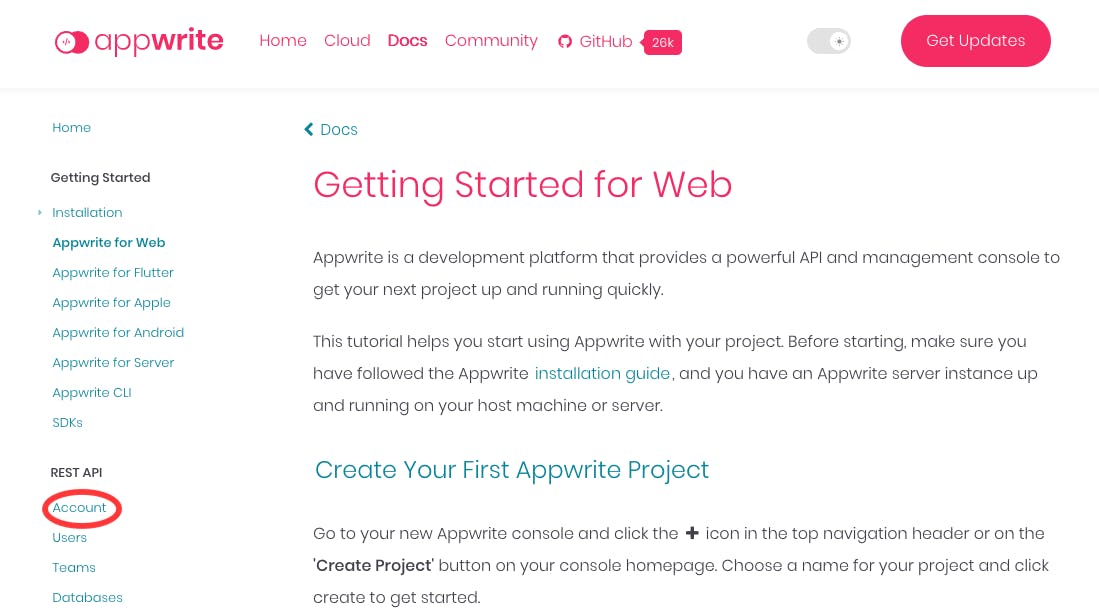
You will follow the example request but replace the project ID and API endpoint with your own from your console.
import { Client, Account } from "appwrite";

const client = new Client();

const account = new Account(client);

client
  .setEndpoint("https://[HOSTNAME_OR_IP]/v1") // Your API Endpoint
  .setProject("5df5acd0d48c2"); // Your project ID

const promise = account.create("[USER_ID]", "email@example.com", "password");

promise.then(
  function (response) {
    console.log(response); // Success
  },
  function (error) {
    console.log(error); // Failure
  }
);
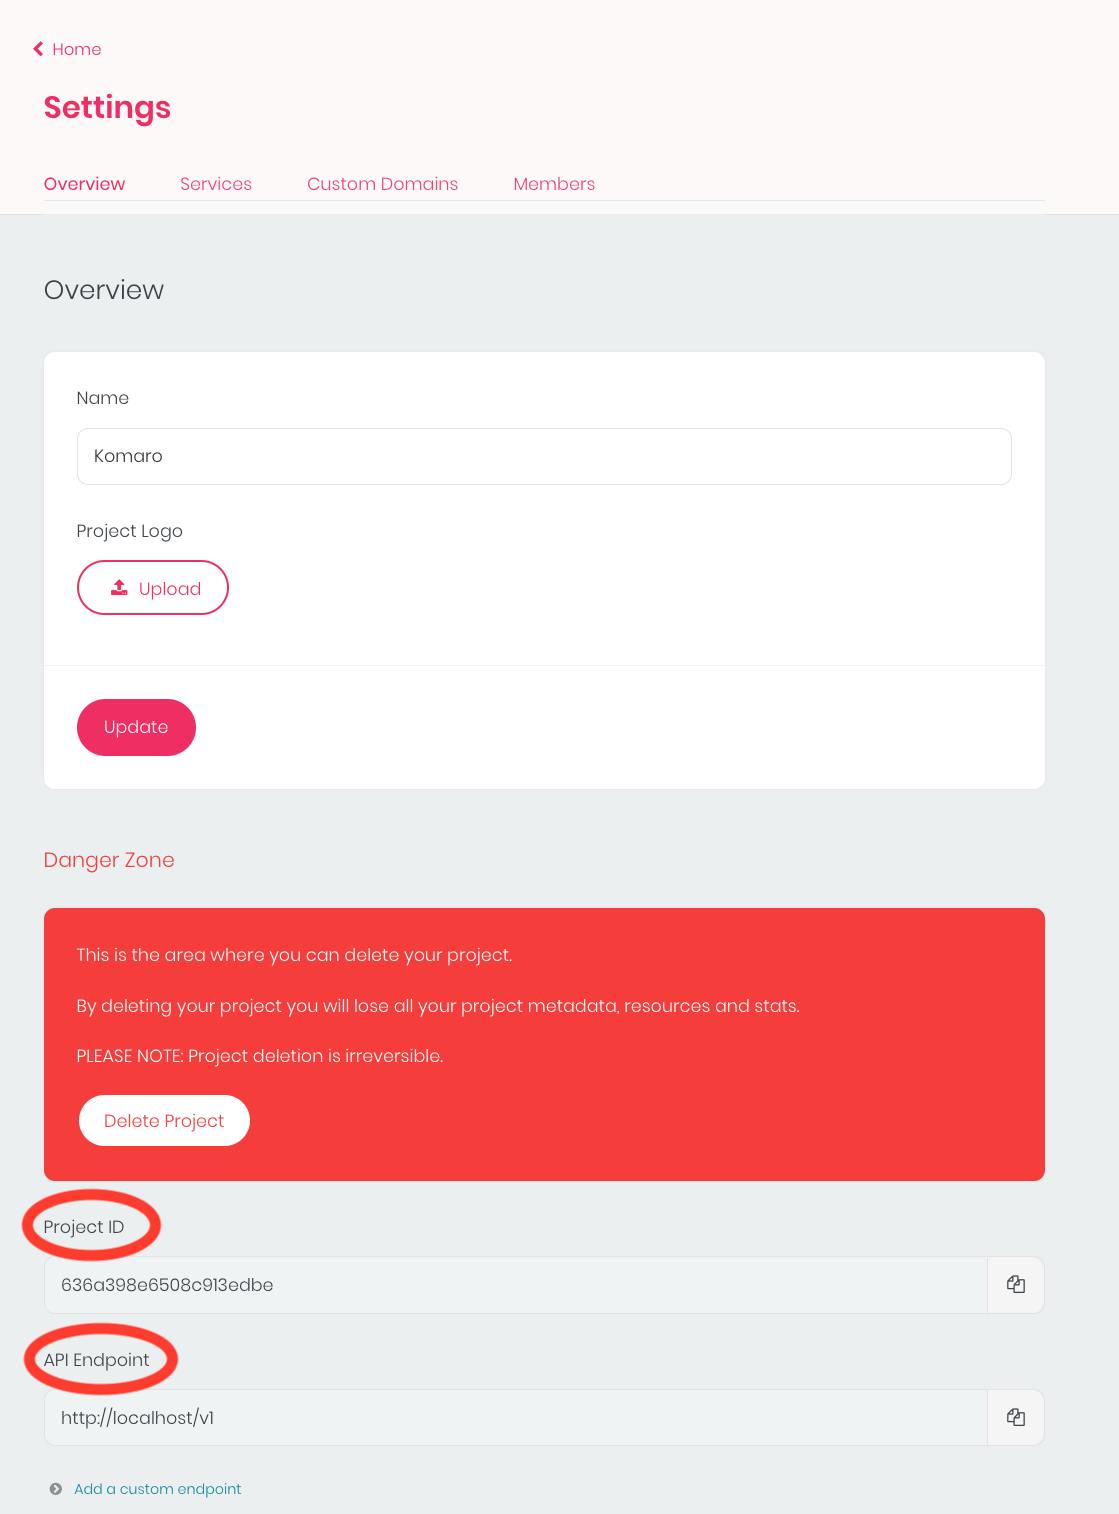
In order to access your project ID and API endpoint, Go back to your Appwrite console Click on Settings from the Menu tab and scroll down you will see your project ID and API endpoint
Step 10
In your appwrite.jsx file, write the code in the sample request above from lines one to ten but replace the setEndpoint with your API endpoint gotten from your console and setProject with your ProjectID
import { Client, Account } from "appwrite";

const client = new Client();

export const account = new Account(client);

client
  .setEndpoint("http://localhost/v1") // Your API Endpoint
  .setProject("636a398e6508c913edbe"); // Your project ID
Step 11
In your Signup.jsx file you will import the account function from the appwrite.jsx file then create a function called registerUser that calls the create account API method that takes a userId, email, and password.
 const registerUser = async(e)=>{
        e.preventDefault();

        const promise = account.create('unique()', email, password, name);
        promise.then(
            function(response){
                console.log(response)
            },
            function(error){
                console.log(error);
            }
        )
    }
Note: The unique() is a method for appwrite to generate user IDs for your users
Step 12
In your Signup.jsx give your Sign Up button an Onclick method that is equal to the userRegister function so that the button when clicked will call the userRegister.
<button className='button_signup' onClick={registerUser}>SignUp</button>
Step 13 Text Fill in your Sign up form and Click on the Signup button
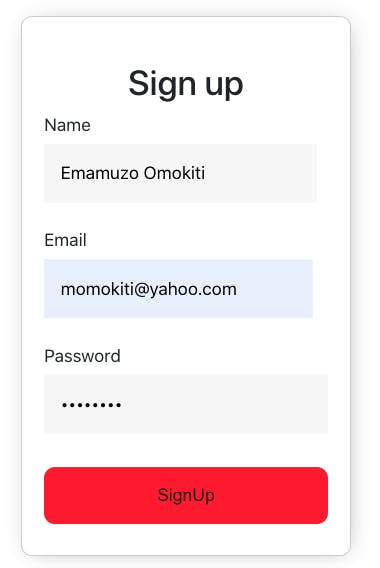
Go to your console on chrome or the browser you are using. You will be able to see the details of the new user that just signed up.
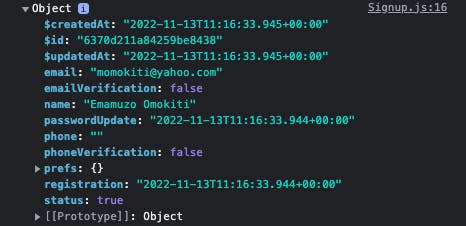
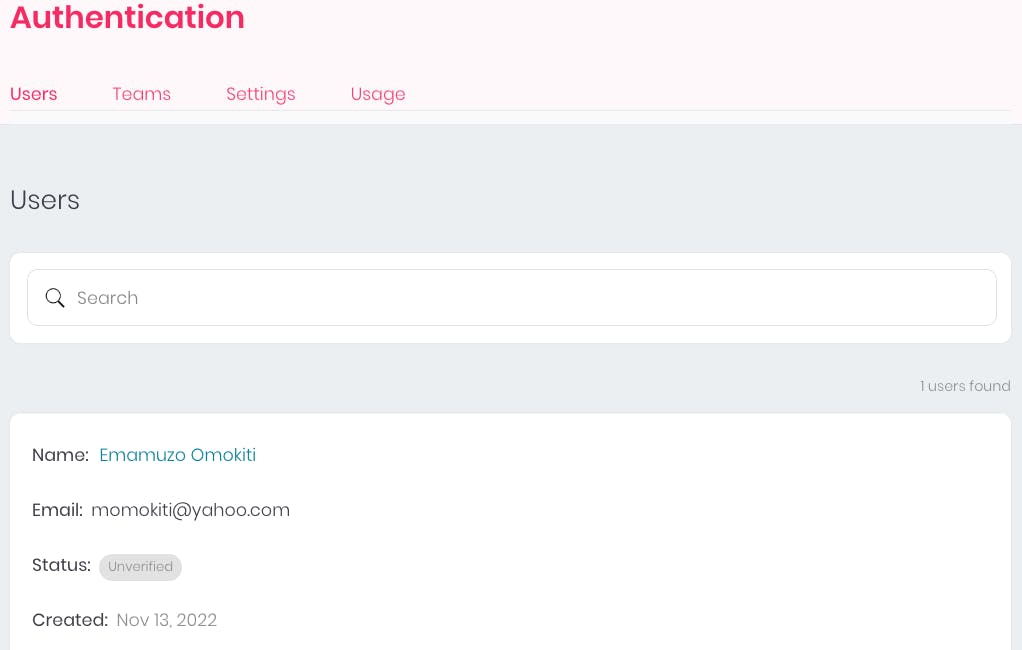
Now You have learned how to create an account. Go to your Appwrite console. Click on the menu tab then Click on Authentication then scroll down you will see the new user/account created
Get an Account
You will learn how to log in a user using the email and password you used to sign up and access the user details.
Step 1
Go back to your components folder on vscode. Create a new file and name it Login.jsx and create a form in your Login.jsx
import { useState } from "react";
import "../styles/Login.css";
const Login = () => {
  const [email, setEmail] = useState("");
  const [password, setPassword] = useState("");

  return (
    <div className="login">
      <form>
        <div className="contain">
          <h2 className="header_form">Log In</h2>

          <label htmlFor="email">
            Email
            <input
              type="email"
              id="email"
              className="login_input"
              value={email}
              onChange={(e) => {
                setEmail(e.target.value);
              }}
            />
          </label>

          <label htmlFor="password">
            Password
            <input
              type="password"
              id="password"
              className="login_input"
              value={password}
              onChange={(e) => {
                setPassword(e.target.value);
              }}
            />
          </label>
          <button className="button_signin" onClick={loginUser}>
            Login
          </button>
        </div>
      </form>
    </div>
  );
};
export default Login;
Step 2
Follow the process in step 8 above but to get an account, you will use the create account session with email example request.
The Create account session with Email allows the user to log in with their email and password.
import { Client, Account } from "appwrite";

const client = new Client();

const account = new Account(client);

client
  .setEndpoint("https://[HOSTNAME_OR_IP]/v1") // Your API Endpoint
  .setProject("5df5acd0d48c2"); // Your project ID

const promise = account.createEmailSession("email@example.com", "password");

promise.then(
  function (response) {
    console.log(response); // Success
  },
  function (error) {
    console.log(error); // Failure
  }
);
Step 3
In your Login.jsx component, create a loginUser function that will call the create email session and navigate the user to their dashboard.
const loginUser = async (e) => {
  e.preventDefault();
  try {
    await account.createEmailSession(email, password);
    navigate("/dashboard");
  } catch (error) {
    console.log(error);
  }
};
Step 4
In your Login.jsx give your Login button an Onclick method that is equal to the loginUser function so that the button when clicked will call the loginUser.
<button className='button_signin' onClick={loginUser}>Login</button>
Step 5
Go back to your components folder on Vscode. Create a new file and name it Dashboard.jsx. This is where you will be routed after you log in.
import { useState, useEffect } from "react";
import { Link } from "react-router-dom";
import { account } from "../services/appwrite";
import "../styles/Dashboard.css";

const Dashboard = () => {
  const [user, setUser] = useState();

  useEffect(() => {
    const getUser = account.get();
    getUser.then(
      function (response) {
        setUser(response);
      },
      function (error) {
        console.log(error);
      }
    );
  }, []);

  return (
    <div className="dashbaord">
      <div className="nav_dash">
        <li>Home</li>
        <li>Account</li>
        <li>Services</li>
      </div>
      <div className="maindash">
        {user ? (
          <p>Hello {user.name} Welcome to your dashboard!!!</p>
        ) : (
          <p>
            Please <Link to="/signup" /> Sign up
          </p>
        )}
      </div>
    </div>
  );
};
export default Dashboard;
From the code above, you will give the dashboard component a state and name it user and a function setUser to update the state. You will create a function getUser that calls the account. get API, then the useEffect will help to show the user name immediately after the user login In return, I am using a ternary operator to check if the user exists. If the user does not exist the user will have to signup.
Step 6
Fill in your login credentials and Click on the Login button
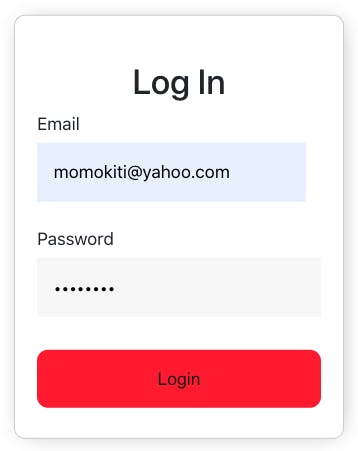
Step 7
You will be routed to your dashboard

Why Appwrite
There are a lot of advantages that Appwrite offers such as;
Easy to set up Appwrite has good documentation that one can follow to set up Appwrite on your system
Easy to use The Appwrite documentation has sample requests for one to follow
Great Services Appwrite has a lot of great services from database to accounts, etc These services help developers to set up the backend of their projects in a short time.
Open source Appwrite being an open-source software is secure, cost-efficient, flexible, and transparent.
Difference between Appwrite and other Backend Servers
There are other backend servers that have been around before Appwrite but each has its own unique features.
| Appwrite | Firebase | Nhost | Supabase |
| Open source self-hosted backend | Not open source | Open source | Open source |
| Provides both MySQL and NoSQL database | Provides only NoSQL | Provides SQL | Provides SQL database that utilizes postgres |
| Owned by Appwrite | Owned by Google | Owned by nhost | Owned by Supabase |
Conclusion
Appwrite is such an interesting open-source backend server that lets you have a full flesh application without actually coding the backend of the application. It provides a lot of services from authentication to database, storage, webhooks, etc.
There are a lot of cool things you can build with Appwrite. I hope with this article you have learned a few things about Appwrite, I look forward to you building cool stuff with Appwrite.