


Table of contents
Introduction
Hedera is the most used public ledger for the decentralized economy.
You can learn more about Hedera from their website.
For this article, We will learn how to use the Hedera Mirror Node REST API to build a simple application in react, that allows you to view your accountId, account balance, and timestamp. it is one of Hedera's APIs. You can check out their docs.
How to use Hedera Mirror Node REST API
The Steps are divided into two sections; Create a Hedera Portal and Getting our Hands Dirty.
Create a Hedera Portal
Step1
Sign up on portal.hedera.com and create a developer testnet account.

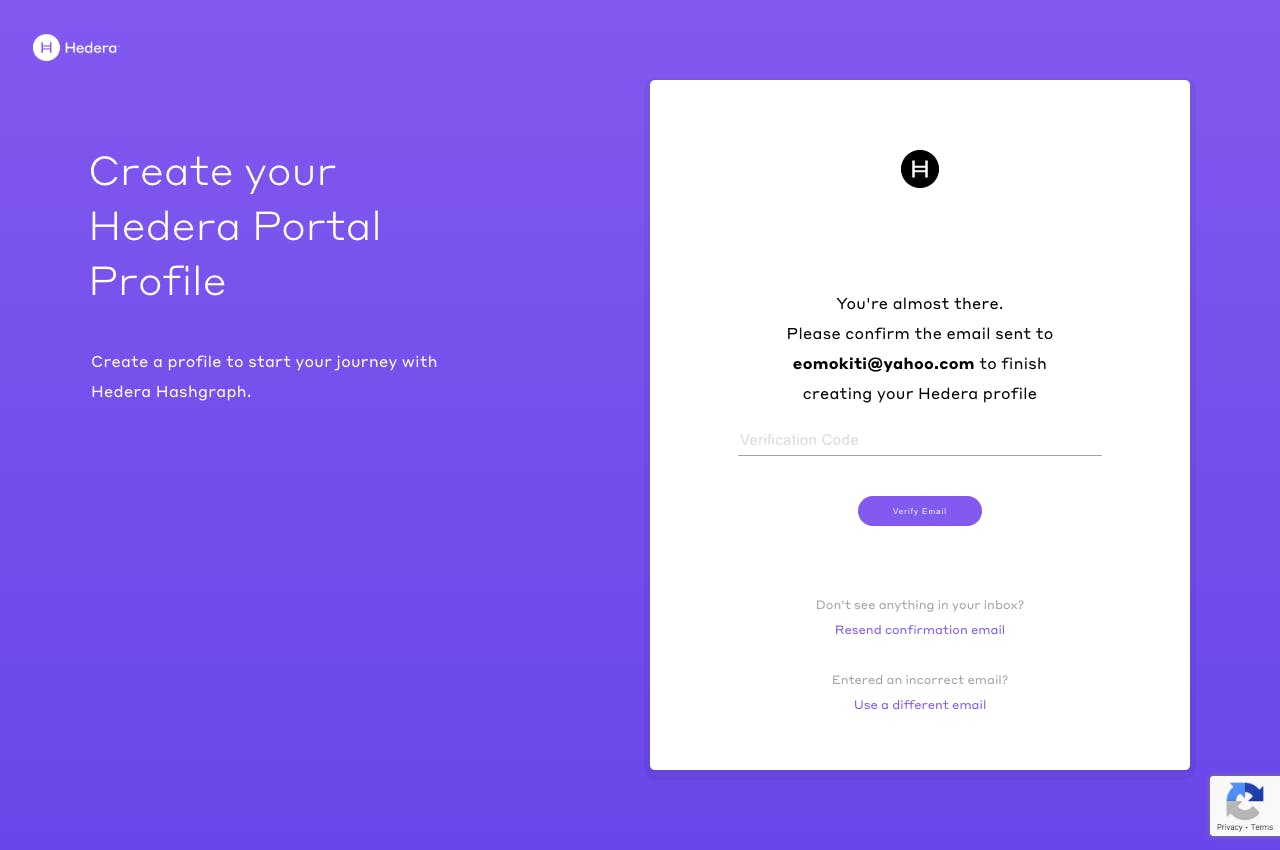
Step 2
You will get a verification code in your email, input the verification code you got in your email to confirm your email.
Step 3
Then input your first and last name.

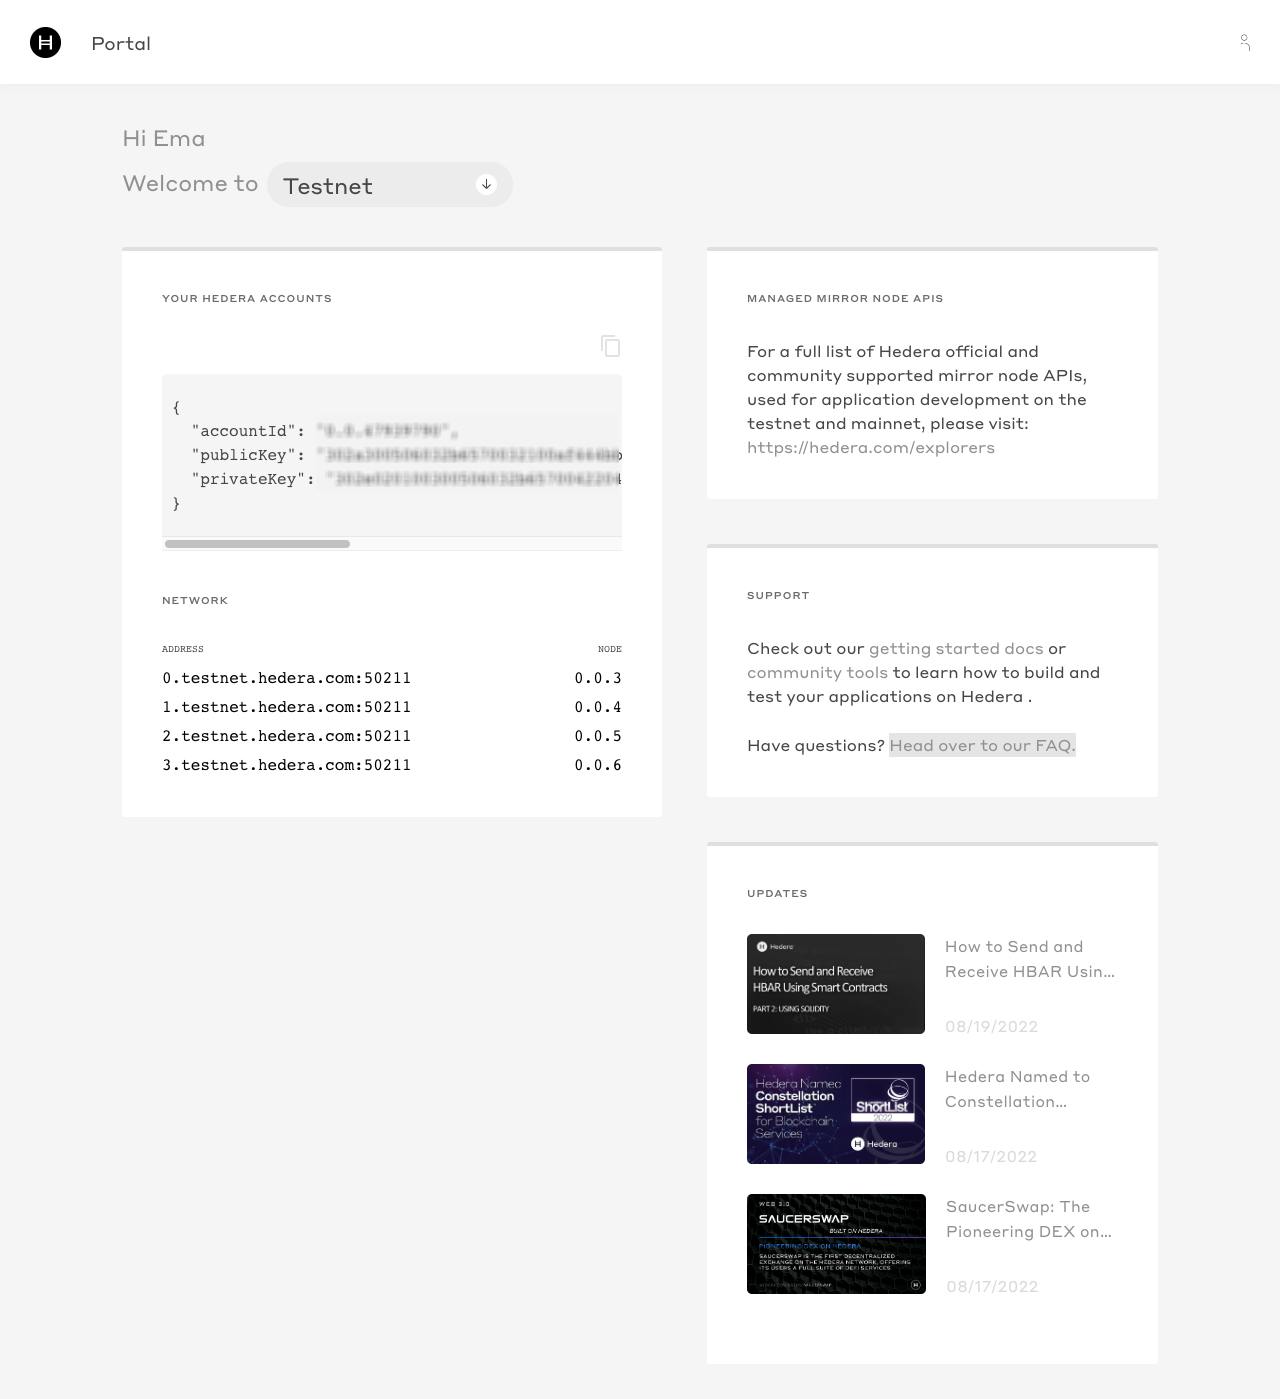
Step 4
You will be routed to your Hedera portal

Click on the "Create Account" button to create a testnet account to get your accountId, public key, and private key to enable you to interact with the API.
Getting our Hands Dirty
Step 1
Create a .env file at the root directory of your project and store your credentials i.e Your accountId and publicKey.
REACT_APP_MY_ACCOUNT_ID=YOUR_ACCOUNT_ID
REACT_APP_MY_PUBLIC_KEY=YOUR_PUBLIC_KEY
Step2
Open your App.js file and store your credentials in variables and also your state.
Then create an async function getBalance that calls the API.
import React from "react";
import "./App.css";
import { useEffect, useState } from "react";

function App() {
  const [account, setAccount] = useState([]);
  const accountId = process.env.REACT_APP_MY_ACCOUNT_ID;
  const publicKey = process.env.REACT_APP_MY_PUBLIC_KEY;

  useEffect(() => {
  const getBalance = async () => {
    const url = `https://testnet.mirrornode.hedera.com/api/v1/balances?account.id=${accountId}`
    const data = await fetch(url, {
       headers: {
          Authorization:`Bearer${accountId} ${publicKey}`
       }
    })
    const jsonData = await data.json();
    console.log(jsonData);
 }
 getBalance();
}, []);
}

export default App;
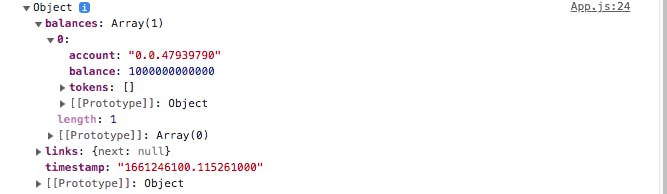
From our console, our jsonData is an object that has arrays in it . You can see the accountId, balance, timestamp, token, and links from the console image above.
Step3
We will Map out our data to the user interface. we will map out the timestamp,accountId, and account balance of a particular user.
import React from "react";
import "./App.css";
import { useEffect, useState } from "react";

function App() {
  const [account, setAccount] = useState([]);
  const accountId = process.env.REACT_APP_MY_ACCOUNT_ID;
  const publicKey = process.env.REACT_APP_MY_PUBLIC_KEY;

  useEffect(() => {
    const getBalance = async () => {
      const url = `https://testnet.mirrornode.hedera.com/api/v1/balances?account.id=${accountId}`;
      const data = await fetch(url, {
        headers: {
          Authorization: `Bearer ${accountId} ${publicKey}`,
        },
      });
      const jsonData = await data.json();
      let arr = [];
      for (let attrs in jsonData) {
        if (attrs === "balances" || attrs === "timestamp") {
          arr.push(jsonData[attrs]);
        }
      }
      setAccount(arr);
    };
    getBalance();
  }, []);

  const mappedLists = account[1]?.map((item, index) => {
    return (
      <div key={index} className="box">
        <p>Account Id:{item.account}</p>
        <p>Account Balance:{item.balance}HBAR</p>
      </div>
    );
  });
  return (
    <div className="box">
      <p>Timestamp:{account[0]}</p>
      {mappedLists}
    </div>
  );
}

export default App;
From our code above, we used a for loop to loop through the attributes(attrs) in the "jsonData".
for (let attrs in jsonData) {
        if (attrs === "balances" || attrs === "timestamp") {
          arr.push(jsonData[attrs]);
        }
      }
Then we selected the attributes((attrs)) we want to display i.e "timestamp" and "balances". Then we pushed the array in the "arr" we declared. Then updated the state with function "setAccount(arr)". Then we mapped the account[1].
const mappedLists = account[1]?.map((item, index) => {
    return (
      <div key={index} className="box">
        <p>Account Id:{item.account}</p>
        <p>Account Balance:{item.balance}HBAR</p>
      </div>
    );
  });
The "?" operator is a check to prevent the application from throwing an error. The application will wait until the state has data updated before loading.
Then we returned the mapped lists we defined above and the account[0] which is the Timestamp.
 return (
    <div className="box">
      <p>Timestamp:{account[0]}</p>
      {mappedLists}
    </div>
  );
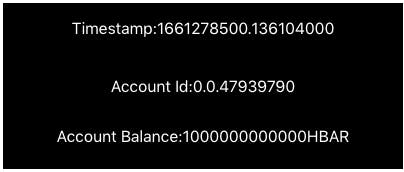
When we refresh our server we would be able to see the image above You can view the complete code on this repo.
Conclusion
I hope you have learned how to use the Hedera Mirror Node REST API in a React Application. You can explore the docs and build amazing apps.